The Benefits of a Layered Haircut
No matter your hair type, adding layers can help take your style to the next level. If you have thin, fine hair, layers will create volume and make your hair look fuller. If your hair is thicker, layers will help your hair move more freely. For curly hair types, layers can keep your hair from getting weighed down and add more definition to your curls. Plus, they’re a fun, easy way to mix up your style without making a dramatic change.
Before you start snipping, though, it’s important to understand that not all layers are the same, so be sure to choose a style that works best for your unique hair type and face shape. For example, if you have thin hair you will most likely want to cut longer layers and avoid thinning your hair further, but if you have curly or thick hair, you might want to cut more drastic layers and use the thinning shears several times.
The good news is, using the CreaClip allows you to experiment with different options and find a style you love! We recommend starting with a small trim so you have room to see how different styles will look without losing too much length.
How to Cut V-Shaped Layers or U- Shaped Layers
Whether you want long, subtle layers or short, drastic ones, start with these simple steps:
- Flip your head over and comb out all the knots and tangles in your hair
- Fasten the large CreaClip over your hair and slide it down to a spot that’s a little longer than your desired length. You can trim more later if you decide you want to!
- Make sure the level is centered in order to get an even cut
- Cut across at a 45-degree angle to get rid of split ends and create a textured look
You’ll end up with long, face framing layers that form a V-shape in the back. If you like how this looks, you can stop here and enjoy your new style! But if you’d like to create more a U-shape, follow these steps:
- Section your hair down the middle and bring half of your hair over each shoulder
- Gather both sides of your hair under your chin and fasten the large CreaClip on top
- Slide the clip down until it’s only holding onto the longest layers, and then trim off the tips by cutting at a 45-degree angle
When you take off the CreaClip, you’ll end up with longer layers that still frame your face, but don’t fall to such a sharp “point” in the back. We especially recommend this style if you have thinner hair, because it will make your hair look fuller and more healthy.
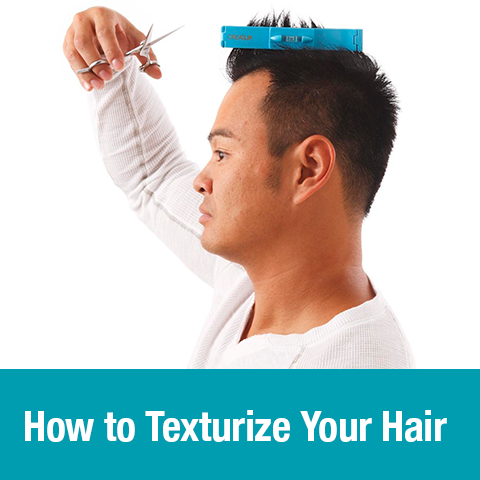
How to Texturize Your Hair
If you’ve completed all these steps and decide that your layers are too blunt, too thick or want to create more texture and thin out your hair? You may want to try the following process to soften your layers further into a U-shape. The key here is to texturize with thinning shears, which is an especially useful technique for people with thick hair:
- Flip your head over and comb out all the knots and tangles in your hair
- Fasten the large CreaClip over your hair and slide it down until you have about 4 inches of space between the bottom of the clip and the ends of your hair
- Take a pair of thinning shears, hold them at a 45-degree angle and snip at the bottom few inches of your hair, moving from left to right. This will texturize the mid area of layers.
- Then side CreaClip until 2 inches from space between the bottom of the clip and then ends of your hair now you will be texturizing the ends of layers. Repeat these two thinning steps as many times as necessary until your layers are as soft as you’d like them to be, however check the style after each time before you thin out more. If you have fine hair, you will want to skip this step altogether, but if you have thicker hair, you may need to do it several times to help your layers fall more gently down your back.
After texturizing your hair, you’ll end up with softer, more U-shaped layers that look great on most thicker hair types.
How to Cut Your Bangs
Once you have your layers cut to the desired length, you may want to add bangs. Or if you already have bangs, you can trim and texturize them to match the rest of your new style.
Just like with layers, the CreaClip makes it easy to create many different styles of bangs, but here are a few of the most popular:


Once again, we recommend starting with a longer bang and then trimming it shorter just an inch or two at a time. Remember, you can always take more length off, but you can’t add it back on! And when you’re using the CreaClip, you don’t have to worry about rushing or even getting it all done in one sitting. Take your time, and have fun playing with as many new styles as you’d like!

Create Your Dream Hairstyle with the Original CreaClip
You can save time and money by purchasing the original CreaClip today. You’ll also gain access to our private, VIP Facebook group, live demos and styling inspiration from other CreaClipers.
